
 German
 Japanese
 Portuguese
 Korea
Korea
 Mexico
 Dutch
Dutch


Inline Fuse: The Tiny Bodyguard That Saves Big Projects (A Pop-Culture Powered, Engineer-Friendly Mega-Guide)

If Iron Man hired a bodyguard for every wire in the suit, it would be an inline fuse—small, fearless, and ready to jump in front of danger. If the Millennium Falcon had better cable protection, Han wouldn’t keep smacking the dashboard. And if Eleven needed to protect a sensor line from the Upside Down of short circuits, she’d tape in an inline fuse before the lights start flickering.
Welcome to your no-fluff, high-signal guide to the inline fuse—what it is, why it matters, how to size it, and exactly how to install an inline fuse (with step-by-step instructions, tools, and a printable checklist). Fun tone, production-grade wiring practices.
Table of Contents
- What Is an Inline Fuse (And Why Every Cable Wants One)
- How an Inline Fuse Works (I²t, Time-Current, and the Art of Sacrifice)
- Inline Fuse Types & Holders: Blade, Glass, MIDI/MEGA, Waterproof & More
- Sizing an Inline Fuse: Current, Voltage, Interrupt Rating, and Speed
- Wire Gauge, Voltage Drop, and Placement: Keeping It Safe & Sane
- How to Install an Inline Fuse (Step-by-Step, Tools, and Checks)
- how to install a inline fuse (Checklist You Can Copy)
- Troubleshooting: Nuisance Blows, Melted Holders, and Mystery Reboots
- Use-Case Playbooks: Automotive, Marine, Solar, Audio, Robotics, IoT
- Cost, BOM, and Buying Tips: Getting the Right Inline Fuse the First Time
- Glossary: The Mini-Lexicon of Fuses and Friends
- Printable Walkthrough & Final Checklist
- Wrap-Up: The Best Time to Add an Inline Fuse Was Yesterday

1) What Is an Inline Fuse (And Why Every Cable Wants One)
A fuse is a deliberately weak link that opens a circuit when current becomes dangerously high. An inline fuse is that fuse packaged in a holder you splice in series with a wire—typically the positive supply line. Unlike PCB or panel fuses, an inline fuse travels with the cable, acting as the bodyguard for your power run.
Where you’ll see inline fuses
- Automotive 12/24 V harnesses (dash cams, LED light bars, pumps, stereos)
- Marine/RV low-voltage distribution where salt and vibration are a thing
- Solar & battery lines feeding charge controllers and inverters
- Audio amplifiers and subwoofer power feeds
- Maker projects where you don’t want a breadboard trace to be your fuse
- Field upgrades when the original design forgot to protect a cable run
Inline fuse vs. no fuse
- With inline fuse: Overcurrent → fuse opens → wiring and downstream electronics live to fight another day.
- Without fuse: Overcurrent → wire heats → insulation softens → short escalates → smoke (or worse).
Think of the inline fuse as your plot armor—not flashy, but the reason the hero survives Act II.
2) How an Inline Fuse Works (I²t, Time-Current, and the Art of Sacrifice)
Fuses respond to heat generated by current flow. The heat scales roughly with I² · R · t (current squared times resistance over time). The element melts when its energy threshold is exceeded, opening the circuit.
Two behaviors that matter
- Fast-blow (fast-acting): Trips quickly—great for delicate electronics or where inrush is minimal.
- Time-delay (slow-blow): Tolerates short surges (motor starts, capacitor inrush) without nuisance blowing.
Time-current curves
Every proper fuse has a curve that tells you how long it will survive at a given overcurrent. Understanding the curve ensures your inline fuse protects wires and tolerates normal start-up surges.
I²t rating
You’ll see an I²t value—the integral of current squared over time. It’s the fuse’s “energy to blow” and a helpful way to gauge tolerance to brief overloads. Bigger I²t → more surge-friendly.
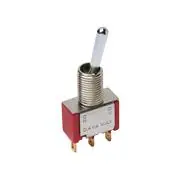
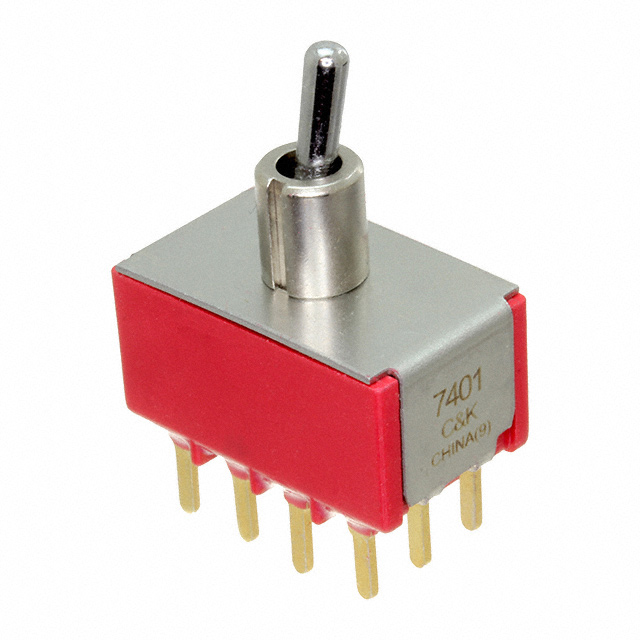
3) Inline Fuse Types & Holders: Blade, Glass, MIDI/MEGA, Waterproof & More
Choosing the right inline fuse is partly about the element, partly about the holder that lives in the wire.
Common fuse formats used inline
- Blade fuses (ATC/ATO, MINI, MICRO2/MICRO3, MAXI): automotive classics—easy to replace, color-coded, widely available.
- Glass/ceramic cartridge (AGC, AGU, 5×20 mm, 6.3×32 mm): common in consumer/industrial gear; check voltage and interrupt ratings.
- MIDI/MEGA/ANL: bolt-down high-current styles (30–300 A) for amplifiers, inverters, and battery lines.
- JCASE/MCase, PAL: OEM cartridge fuses for modern vehicles; inline holders exist but watch stocking.
- Resettable PTCs (polyfuse): sometimes used inline for low-power electronics; they reset but behave differently than traditional fuses.
Holder features to look for
- Waterproof rating (IP65–IP67) for engine bay/marine
- Wire gauge compatibility (e.g., 16–12 AWG)
- Contact quality (springy, low-resistance, corrosion-resistant)
- Cap style (snap, screw, O-ring)
- Serviceability (field-replaceable without special tools)
- Mounting (inline hanging vs. panel clip vs. bolt-down)

4) Sizing an Inline Fuse: Current, Voltage, Interrupt Rating, and Speed
This is where most designs succeed—or become subplots in the “mysterious resets” episode.
A. Current rating (continuous vs. surge)
- Measure/estimate continuous current at worst case (max brightness, stall, full RPM, etc.).
- Account for inrush/peak (motors, lamps, big capacitors).
- Pick a fuse rating typically 125–150% of continuous current if inrush is modest, or choose a time-delay fuse closer to continuous current when inrush is substantial.
Examples: LED bar 9 A → 12–15 A blade inline fuse; pump 6 A with 3× start → 10–12 A time-delay; 12 V audio amp 40 A peak → 50–60 A ANL/MIDI.
B. Voltage rating
Fuses have a maximum voltage (e.g., 32 V DC automotive, 125/250 V AC cartridge). Use ≥ your system voltage.
C. Interrupt (breaking) rating
How much fault current the fuse can safely interrupt without exploding. For higher-energy DC systems (large lithium packs, PV strings), select fuses with adequate DC interrupt ratings.
D. Speed (fast vs. time-delay)
- Sensitive electronics and low inrush → fast-acting.
- Motors/lamps/capacitive loads → time-delay.
E. Temperature and environment
High ambient temperatures derate fuses. Under-hood or enclosed spaces may need a lower current fuse or a higher-rated holder to avoid nuisance blowing.
F. Wire is part of protection
Fuses protect wires and downstream gear. Match fuse rating to wire ampacity with margin.
5) Wire Gauge, Voltage Drop, and Placement: Keeping It Safe & Sane
Wire gauge vs. current (quick heuristics for low-voltage DC, short runs)
- 20 AWG: ~1–3 A
- 18 AWG: ~5–7 A
- 16 AWG: ~8–10 A
- 14 AWG: ~12–15 A
- 12 AWG: ~20–25 A
- 10 AWG: ~30–40 A
(Always check your preferred ampacity chart and derate for temperature, bundling, and run length.)
Voltage drop
At 12 V, even a small drop matters. Keep high-current runs short, use thicker wire, and verify using V = I × R along the cable.
Placement: how close is “close”?
Mount the inline fuse as close to the power source as practical (often 10–20 cm from battery/supply). Goal: protect the entire downstream wire.
6) How to Install an Inline Fuse (Step-by-Step, Tools, and Checks)
Here’s a definitive, repeatable installation method—from garage bench to production line.
Tools & materials
- Inline fuse holder (correct format/rating, waterproof if needed)
- Correct inline fuse (rating, speed, voltage, interrupt)
- Wire (gauge matched to current and length)
- Crimp terminals (butt splices/ring) or solder kit
- Quality ratcheting crimper (or soldering iron + rosin-core solder)
- Heat-shrink tubing (adhesive-lined preferred)
- Cable ties / P-clips for strain relief and routing
- Multimeter (continuity/voltage checks)
- Label (fuse rating, circuit name)
Safety first
- Power off and disconnect the battery/source before cutting.
- Wear eye protection; treat energized DC lines with respect.
The steps
- Plan the location: Close to the power source, away from heat; leave service access.
- Cut the wire: Identify the positive lead and cut where the inline fuse will live. Strip ~6–7 mm.
- Slide on heat-shrink: Put tubing on each wire end before crimp/solder.
- Crimp or solder the holder leads: Use gas-tight ratcheting crimps or clean solder joints. Tug test.
- Heat-shrink the joints: Adhesive-lined tubing seals out moisture.
- Insert the fuse: Correct rating/speed; seat fully; close cap/O-ring.
- Label the holder: e.g., “F1—LED Bar—15 A”.
- Secure the cable: Ties/P-clips; avoid chafe and hot zones.
- Test: Continuity through fuse path; power up; measure voltage at load; check for hot joints (IR thermometer helps).
- Document: Update wiring diagram with fuse location, rating, wire gauge.
Pro build tips
- For ≥40 A, consider bolt-down styles (MIDI/MEGA/ANL) with ring lugs, proper torque, lock washers.
- In harsh environments, use IP-rated holders and tinned copper marine cable.
- Don’t bury fuses under trim where replacement becomes a mini-boss fight.
.png?x-oss-process=image/auto-orient,1/quality,q_70/format,webp)
7) how to install a inline fuse (SEO Checklist You Can Copy)
Yes, the grammar is “an inline fuse,” but many folks search for “how to install a inline fuse.” This checklist speaks to that exact query:
- Pick the inline fuse type that matches the circuit (blade, cartridge, MIDI/MEGA).
- Size the inline fuse at ~125–150% of continuous load; consider inrush and fuse speed.
- Place the inline fuse near the power source to protect the full run.
- Match wire gauge to the fuse and load; avoid voltage-drop surprises.
- Use ratcheting crimps or proper solder joints; apply heat-shrink.
- Insert the inline fuse and secure the holder; label it for service.
- Test voltage under load and check for hot joints.
- Document fuse rating and location for future maintenance.
8) Troubleshooting: Nuisance Blows, Melted Holders, and Mystery Reboots
Fuse blows at startup
Cause: Inrush too high for fast-blow. Fix: Use time-delay inline fuse or upsize one step within wire ampacity.
Holder runs hot
Cause: Undersized holder, poor contacts, bad crimp, corrosion. Fix: Upgrade holder, redo crimps, clean/apply dielectric grease.
Random reboots
Cause: Voltage drop along cable/fuse contacts. Fix: Thicker wire, shorter run, higher-quality holder.
Wire damage but fuse intact
Cause: Fuse rating too high or fuse far from source. Fix: Match fuse to wire ampacity; relocate near source.
Corrosion in holder
Cause: Moisture ingress. Fix: IP-rated waterproof inline fuse holder, adhesive heat-shrink, better routing.
9) Use-Case Playbooks: Automotive, Marine, Solar, Audio, Robotics, IoT
A. Automotive LED Light Bar (12 V)
- Load: 9 A continuous
- Wire: 14 AWG (short run)
- Fuse: 15 A blade inline fuse in waterproof holder near battery
- Notes: Route away from heat; use relay for low-current switch control.
B. Dash Cam + Accessory Outlet
- Load: 2 A continuous; ignition spikes
- Wire: 20–18 AWG
- Fuse: 3–5 A inline fuse (fast or time-delay per inrush)
- Notes: Label circuits; avoid mystery taps.
C. Marine Bilge Pump (12/24 V)
- Load: 6 A running, 18 A stall
- Wire: Tinned 14–12 AWG marine cable
- Fuse: 10–15 A time-delay inline fuse in waterproof holder near battery
- Notes: IP rating matters; use adhesive heat-shrink.
D. Solar Panel to Charge Controller
- Load: ~12 A Isc
- Wire: 12 AWG UV-resistant
- Fuse: 15 A inline fuse on positive lead near controller/combiner
- Notes: Confirm DC interrupt rating for PV.
E. Car Audio Amplifier (Main Feed)
- Load: Up to 40–50 A
- Wire: 8–4 AWG
- Fuse: 50–60 A ANL/MIDI inline fuse within 20 cm of battery
- Notes: Torque lugs; lock washers; protect from chafe.
F. Robotics/RC/Maker Li-ion Pack
- Load: 5–20 A bursts
- Wire: 16–12 AWG silicone
- Fuse: Time-delay inline fuse sized for bursts; PTC only for low-power lines
- Notes: Keep fuses accessible without full disassembly.
.png?x-oss-process=image/auto-orient,1/quality,q_70/format,webp)
10) Cost, BOM, and Buying Tips: Getting the Right Inline Fuse the First Time
- Don’t bargain on holders. A good inline fuse holder with strong contacts and real waterproofing is cheap insurance.
- Standardize formats. If your fleet is all ATC/ATO blade, stocking and service are painless.
- Label and stock spares. Tape a spare fuse to the harness; field techs will cheer.
- Match wire & accessories. Buy butt splices, ring lugs, and heat-shrink sized for your wire and environment.
- Documentation. Put fuse ratings and locations in the maintenance manual.
11) Glossary: The Mini-Lexicon of Fuses and Friends
- Inline fuse: A fuse in a series holder spliced into a wire.
- Blade fuse (ATC/ATO/MINI/MICRO/MAXI): Automotive plug-in styles.
- Time-delay (slow-blow): Survives short inrush; opens on sustained overload.
- Interrupt rating: Max fault current a fuse can safely clear.
- I²t: Energy needed to melt the fuse element.
- ANL/MIDI/MEGA: High-current bolt-down fuse families.
- IP rating: Environmental sealing level for holders.
- Ampacity: Current a wire can carry continuously without damage.
12) Printable Walkthrough & Final Checklist
Pre-Install
- Load current measured (continuous & inrush)
- Fuse rating chosen (125–150% continuous or time-delay for surge)
- Voltage & interrupt rating verified
- Holder type & IP rating selected
- Wire gauge selected for current & run length
Install
- Power disconnected
- Fuse placed near source (10–20 cm typical)
- Clean crimps/solder + adhesive heat-shrink
- Holder secured; no chafe points
- Fuse inserted; value labeled
Post-Install
- Continuity check through inline fuse
- Voltage at load under operation
- No excessive heating at joints/holder
- Documentation updated (rating, location, wire gauge)
.png?x-oss-process=image/auto-orient,1/quality,q_70/format,webp)
13) Wrap-Up: The Best Time to Add an Inline Fuse Was Yesterday
The inline fuse is the smallest hero on your harness—cheap, fast to install, and decisive when current goes rogue. Pick the right inline fuse rating and speed, mount it near the source, crimp/solder like a pro, seal it against the elements, and label it for the next tech. Do that, and your cables will have the plot armor they deserve.
If Tony Stark can trust a tiny arc reactor not to blow up the lab (well… most days), you can trust a properly chosen inline fuse to keep your circuit from turning into a season finale.
Quick Reference (Stick on Your Bench)
- Place inline fuse near the source.
- Size for continuous current + inrush + wire ampacity.
- Fast-blow for delicate, time-delay for surge-heavy loads.
- Crimp/solder correctly, heat-shrink, secure, and label.
- Test under load; check for hot joints and voltage drop.

 FAQ
FAQ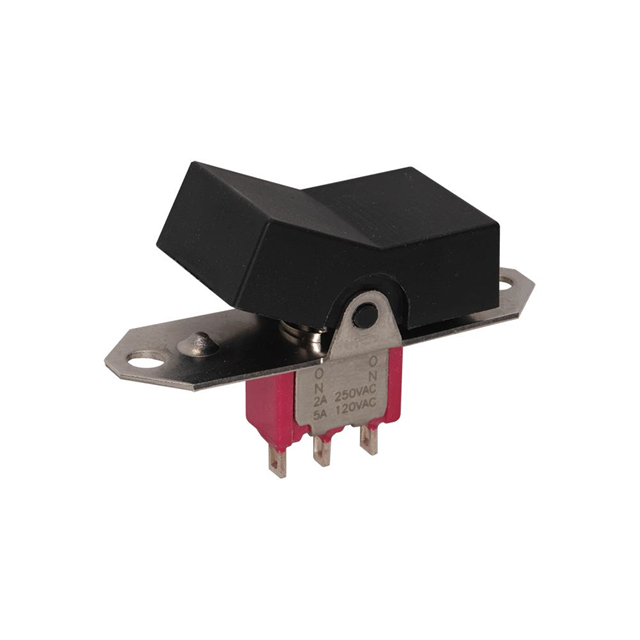


.png?x-oss-process=image/format,webp/resize,h_32)


